Custom agents are review rules that enforce your organization’s specific best practices across pull requests. The rules library lets you discover proven agents from other successful teams, apply one agent to multiple repositories, and manage everything from a central dashboard.Documentation Index
Fetch the complete documentation index at: https://docs.cubic.dev/llms.txt
Use this file to discover all available pages before exploring further.

Rules library
The rules library enables teams to share and adopt best practices efficiently. Instead of creating the same agent for each repository, you can create an agent once and apply it to any number of repositories. Manage all your agents from the rules libraryCreating custom agents
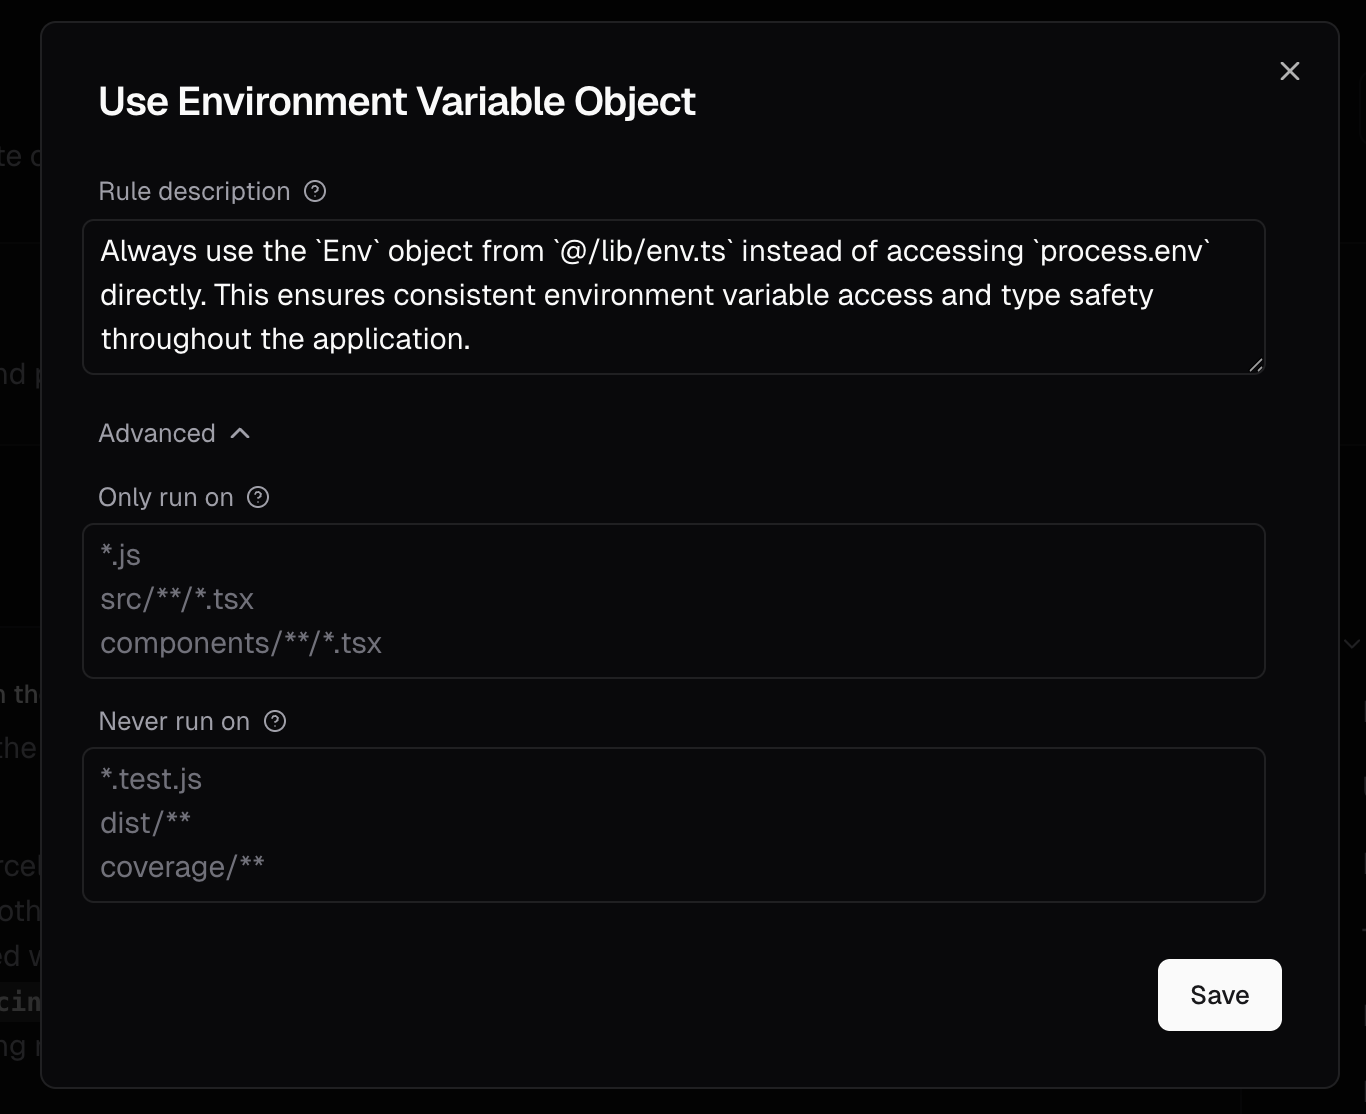
To create a new agent, navigate to the Rules library in cubic and click “Add rule”. You can also adopt existing agents from the community library with a single click. Each custom agent includes:-
A Name
A concise title, like “Prevent N+1 Queries” or “Require Sentry Error Handling.” -
A Description
A clear, natural-language instruction the AI will use, such as “Flag code that may cause multiple database calls inside loops.” -
Optional Path Filters
Use Glob patterns to limit where the agent applies (or exclude certain paths). This is especially helpful for monorepos, where different directories often require different agents. For example:- Include:
backend/**to apply the agent only to files under abackendfolder. - Exclude:
!tests/**to ignore test files and focus on production code.
- Include:
Custom agents can be applied to multiple repositories from a single definition. You can enable
different combinations of agents for each repository while managing them all from one central
location.
Agent attribution in comments
When a custom agent flags an issue, the review comment will indicate which agent triggered it. This helps you understand which agents are working and allows you to iterate on your agent instructions over time.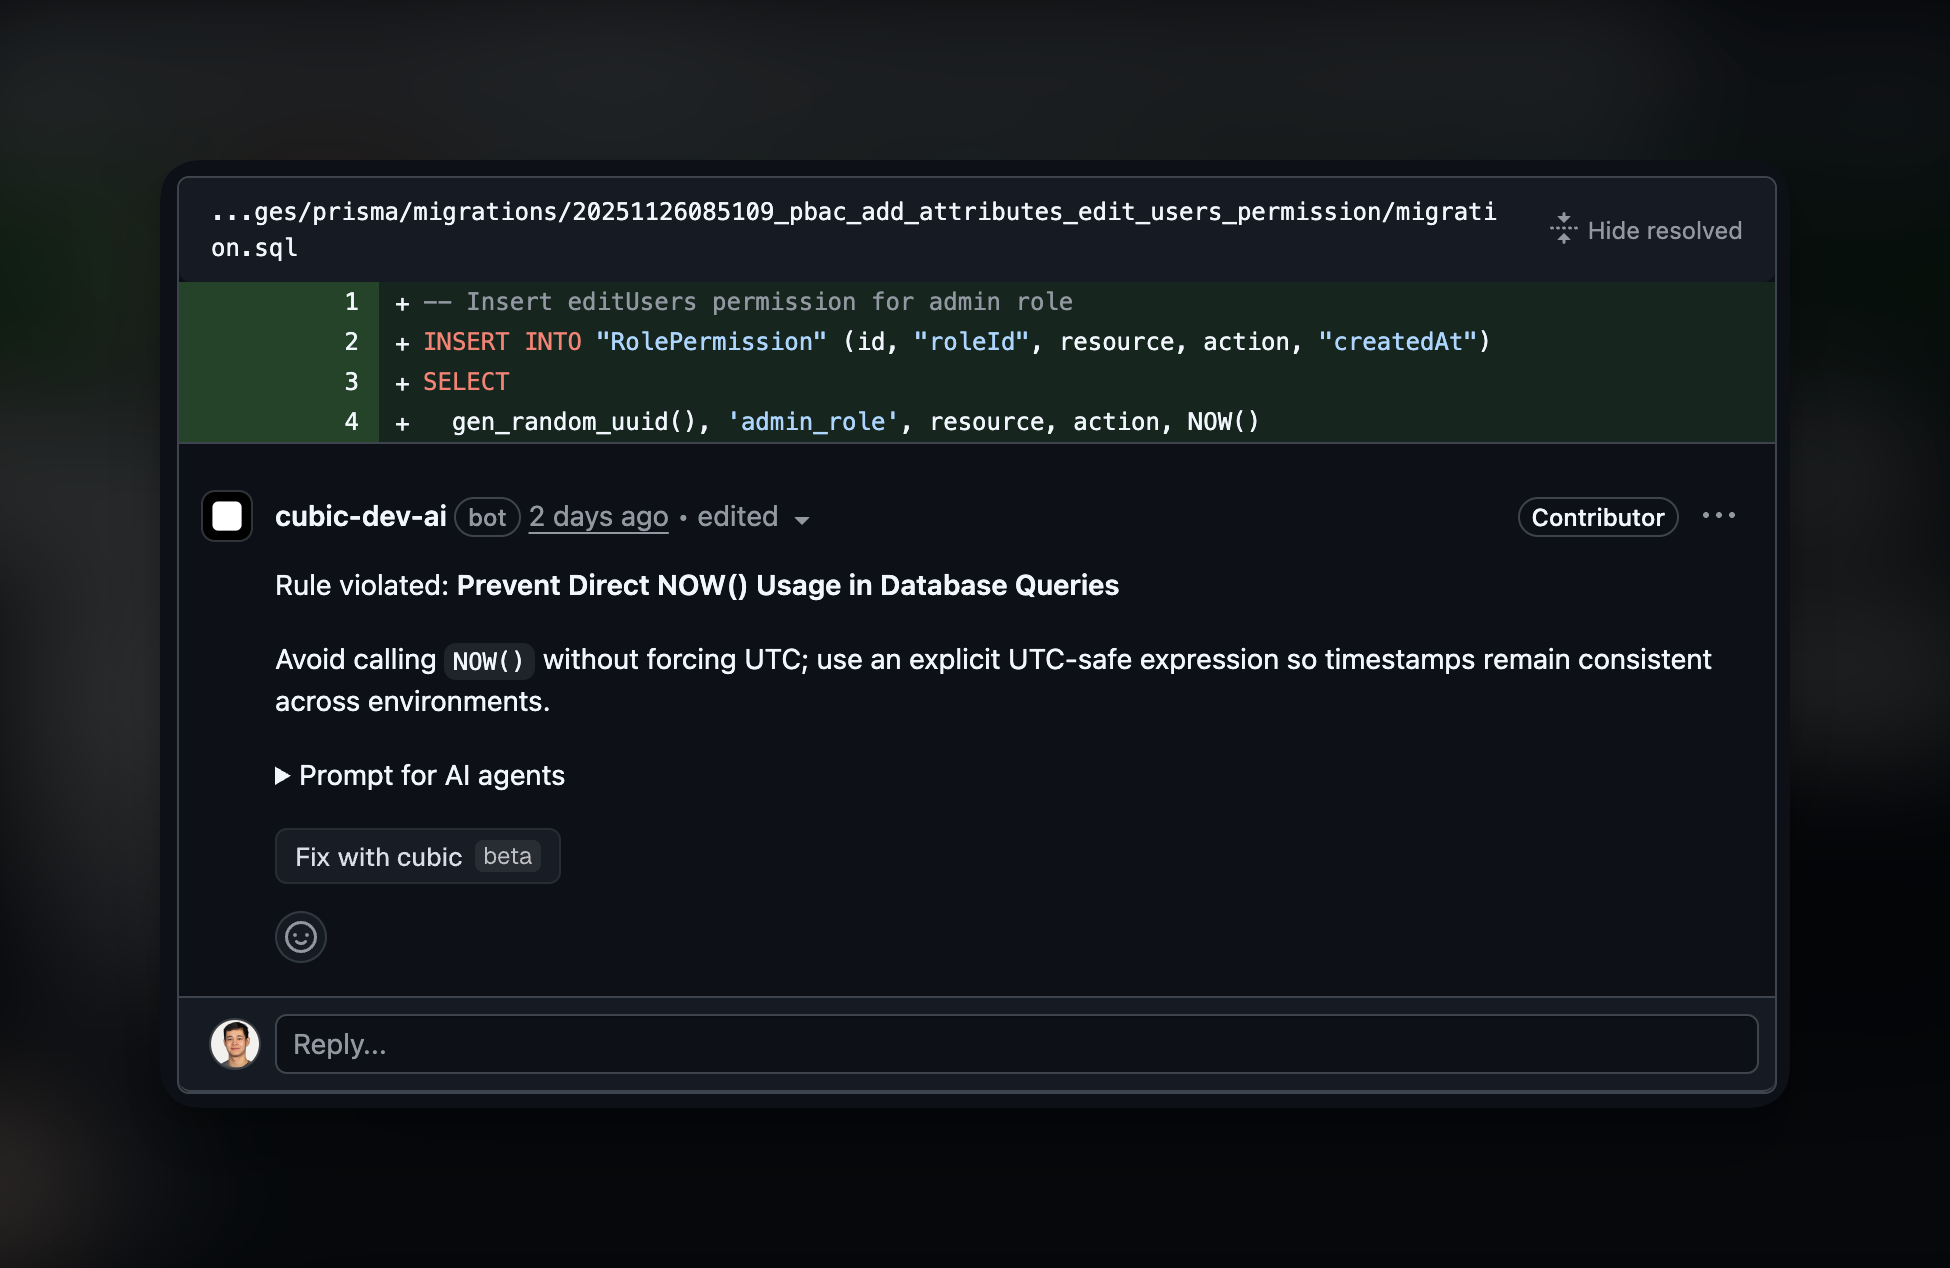
Managing agents across repositories
The multi-repository management capability streamlines how teams handle custom agents at scale:One agent, many repositories
When you create or edit an agent, you can select which repositories it applies to:- Use the repository selector to choose multiple targets
- Apply the same security check to all 150 microservices with one agent
- Maintain consistency without duplication
Repository-specific control
While agents are centrally managed, you maintain granular control:- Enable or disable agents per repository as needed
- Different repositories can use different combinations of agents
- Changes propagate instantly across all selected repositories
Benefits for teams at scale
This approach dramatically simplifies agent management:- Before: Creating 150 separate agents for 150 microservices
- After: One agent applied to all 150 repositories
- Time saved: Hours of setup reduced to minutes
- Maintenance: Update once, apply everywhere
Limitations
- Agent limit: Each repository can have a maximum of 5 enabled custom agents at a time. The rules library allows you to define more agents but only 5 can be active per repository.
- Potential false positives: Occasionally, the AI might incorrectly flag or overlook certain scenarios. Consider AI feedback as helpful guidance rather than definitive judgments.
Tips for effective custom agents
- Start with the library: Before creating a new agent, check if a similar one already exists in the community library. You can adopt and customize popular agents to fit your needs.
- Combine related checks: With a limit of 5 active agents per repository, combine multiple related checks into a single agent where it makes sense. The multi-repository feature means you only need to define this once.
- Leverage path filters in monorepos: When working with monorepos, use Glob patterns to target specific files or folders. The “glob wizard” and “glob testing” tools help ensure your patterns work correctly.
- Use repository groups: Apply agents to logical groups of repositories (e.g., all frontend repos, all microservices) to maintain consistency across similar projects.
- Learn from others: Browse popular agents in the library to see what other successful teams are checking for. This can inspire new agents or improvements to your existing ones.
- Complement existing tools: Custom agents should focus on checks that standard tools like ESLint or Prettier might miss, such as business logic validations or team-specific conventions.
Next steps
- Rules library: Explore community agents and manage your custom agents across repositories.
- AI review settings: Configure AI review behavior for your repositories.
- Introduction: Understand how cubic reviews pull requests by default.